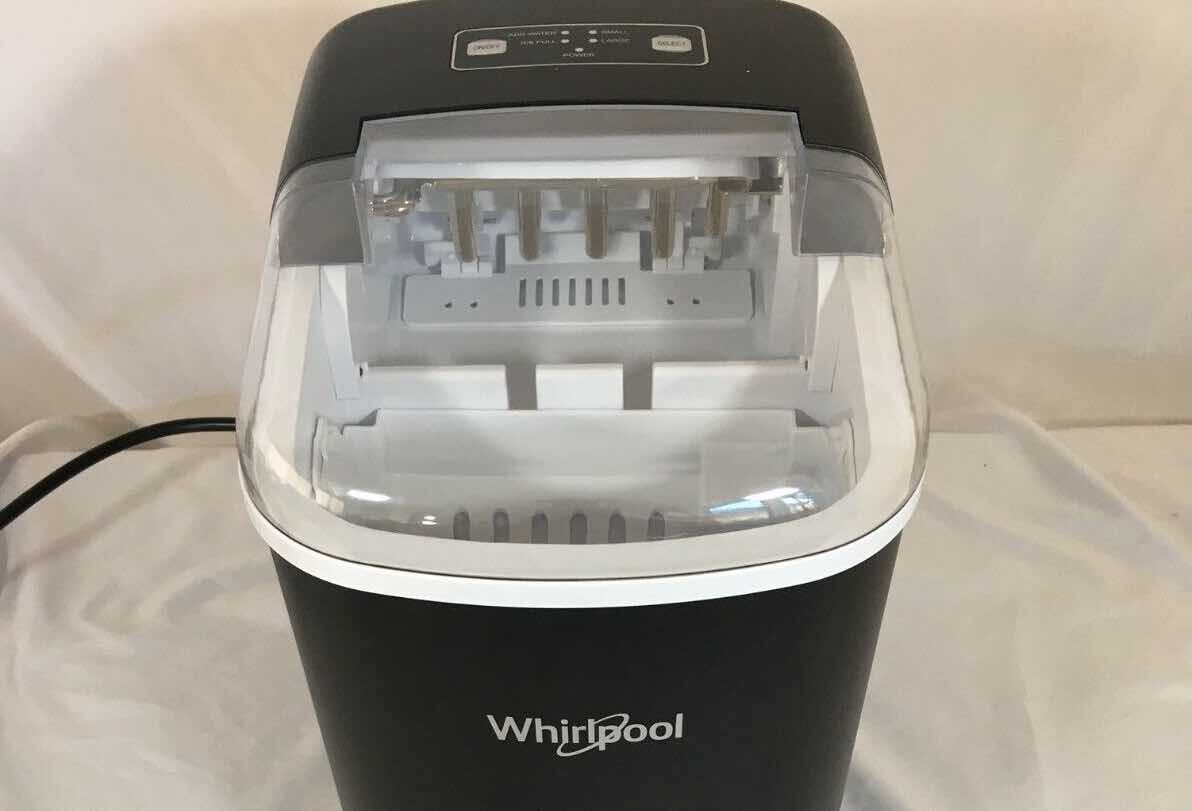
Having a Whirlpool ice maker that’s not dumping ice can be truly upsetting. However, there are several ways to fix this problem without having to spend extra on a technician.
Before we get started, it’s important to note that the Whirlpool ice maker comes in different models, and the troubleshooting steps may vary depending on the specific model you have. However, the basics remain the same.

Whirlpool Ice Maker Not Dumping Ice: Possible Causes
Clogged or Frozen Water Supply Line: A clogged or frozen water supply line can prevent the ice maker from receiving water, which can cause it to malfunction.
Faulty Water Inlet Valve: The water inlet valve controls the flow of water into the ice maker. If it’s faulty, it can prevent the ice maker from receiving water.
Defective Ice Maker Motor: If the ice maker motor is not functioning properly, it won’t be able to turn the auger or ejector blades, which can prevent ice from being dumped.
Malfunctioning Ice Level Control Board: The ice level control board determines when the ice bin is full and sends a signal to the ice maker to stop producing ice. If it’s malfunctioning, it can cause the ice maker to stop producing ice altogether.
How to Fix a Whirlpool Ice Maker That Isn’t Dumping Ice
1. Check the Water Supply Line
To check for clogs or frozen areas in the water supply line, you can follow these steps:
- Turn off the water supply to the ice maker.
- Disconnect the water supply line from the ice maker.
- Inspect the line for any visible clogs or ice buildup.
- If you see any blockages, try to remove them by running hot water through the line or using a hairdryer to thaw the ice.
- Reconnect the water supply line and turn on the water supply.
2. Inspect the Water Inlet Valve
To inspect the water inlet valve, you can follow these steps:
- Turn off the water supply to the ice maker.
- Locate the water inlet valve at the back of the refrigerator where the water supply line connects.
- Disconnect the water supply line from the valve.
- Check if water is flowing through the valve by using a multimeter to test for continuity or manually filling the valve with water to see if it comes out the other end.
- If water is not flowing through the valve, it may be faulty and needs to be replaced.
3. Test the Ice Maker Motor
To test the ice maker motor, you can follow these steps:
- Locate the test button on the ice maker and press it for 10 seconds.
- This will initiate a cycle and move the ejector arm to the dump position.
- If the motor is not turning the ejector blades or auger, it may be defective and needs to be replaced.
- You can also manually turn the auger or ejector blades to check if they are rotating smoothly.
4. Check the Ice Level Control Board
To check the ice level control board, you can follow these steps:
- Remove the front cover of the ice maker to access the control board.
- Check for any visible signs of damage or burn marks on the board.
- Use a multimeter to test for continuity across the board’s contacts.
- If the board is malfunctioning, it may need to be replaced.
Additional Tips
Regularly Clean the Ice Maker and the Surrounding Area
To clean the ice maker, you can follow these steps:
- Turn off the ice maker and unplug the refrigerator.
- Remove the ice bin and wash it with warm water and dish soap.
- Use a soft-bristled brush to clean the ice maker’s interior and exterior.
- Wipe down the surrounding area with a damp cloth to remove any dirt or debris.
Keep the Ice Maker Away From Direct Sunlight or Heat Sources
To prevent the ice maker from malfunctioning due to heat, you can follow these steps:
- Keep the ice maker away from direct sunlight, ovens, stoves, or other heat sources.
- Ensure that the room temperature is between 55-110°F (13-43°C) for optimal ice production.
Use a Water Filter
To ensure that the water being supplied to the ice maker is clean and free from impurities, you can install a water filter. The water filter will remove any sediments, chlorine, or other impurities that can affect the taste and quality of the ice.
Contact a Professional Technician
If you have followed all the troubleshooting steps and still can’t resolve the issue, consider contacting a professional technician. They can diagnose the problem and provide you with the best possible solution.
Final Thoughts
Fixing a Whirlpool ice maker not dumping ice can be done by checking for clogs or frozen areas in the water supply line, inspecting the water inlet valve, testing the ice maker motor, and checking the ice level control board.
Regular cleaning and maintenance of the ice maker can also help prevent future issues. Additionally, keeping the ice maker away from direct sunlight or heat sources, using a water filter, and contacting a professional technician if needed are all important steps to ensure that your ice maker continues to function properly.
It’s important to note that while these solutions are often effective, some issues with the ice maker may require the help of a professional technician. Attempting to repair complex issues without proper training and knowledge can be dangerous and cause further damage to the appliance.
If you are not confident in your ability to troubleshoot and repair the ice maker on your own, it’s always better to seek the help of a professional. They have the necessary experience, tools, and expertise to diagnose and repair the issue safely and efficiently. In most cases, following the steps outlined above can help you to identify the root cause of the issue and take appropriate action to get your ice maker working properly again
Related:
- GE Dishwasher Diagnostic Mode Instructions
- GE Dishwasher No Lights on Control Panel [FIXED]
- GE Dishwasher Fuse Location Revealed
- Samsung Dishwasher Diagnostic Mode Instructions
- GE Microwave Fuse Location & Replacement Guide
- Kitchenaid Dishwasher Diagnostic Mode Explained
- Kohler Touchless Faucet Not Working: Causes & Fixes
- Best Settings for Miele Coffee Machine
- Cuisinart Dehydrator Temperature Settings Guide
- Cuisinart Coffee Grinder Settings Explained
![GE Dishwasher No Lights on Control Panel [FIXED] GE Dishwasher No Lights on Control Panel [FIXED]](https://homestuffmag.com/wp-content/uploads/2023/07/ge-dishwasher-fuse-location-211x150.jpg)


