From garage workshops to industrial settings, an air hose reel is a versatile and essential tool for keeping your workspace organized and efficient.
But finding the perfect mounting solution can be a puzzle that leaves many DIY enthusiasts scratching their heads. Fret not, as we bring you a collection of innovative ideas and expert tips to elegantly tackle the task of air hose reel mounting.
If you’re an avid DIY enthusiast spending nights in your garage, having compressed air can be a game-changer for your projects. Installing a retractable air hose reel is a practical and cost-effective solution, but it’s essential to choose the right mounting location.
7 Air Hose Reel Mounting Ideas
Consider the following ideas and tips for mounting your air hose reel:
1. Ceiling Mount: Efficient and Out of the Way
Mounting the hose reel on the ceiling offers excellent accessibility and saves valuable floor space. You can either install it directly on the ceiling for easy visibility or go the extra mile and place it above the ceiling, leaving only the hose exposed. While this option requires more effort, the end result is a clutter-free and efficient workspace.
2. Front of Garage: Ideal for Car Enthusiasts
For car enthusiasts spending significant time working on their vehicles, mounting the hose reel at the front of the garage is a practical choice.
This location allows easy maneuverability around the car, facilitating automotive maintenance tasks. Keep in mind that if you need to extend the hose outside the garage, ensure it is long enough to reach your desired work areas.
3. Underneath Workbench: Utilizing Space Efficiently
If your garage has substantial workbenches, you can make the most of the space by placing the hose reel underneath. Connect the airlines, and consider using plastic sheeting or wood to conceal the setup.
This setup is particularly useful if you frequently use air-powered tools on your workbench, as it keeps the hose easily accessible yet hidden from view.
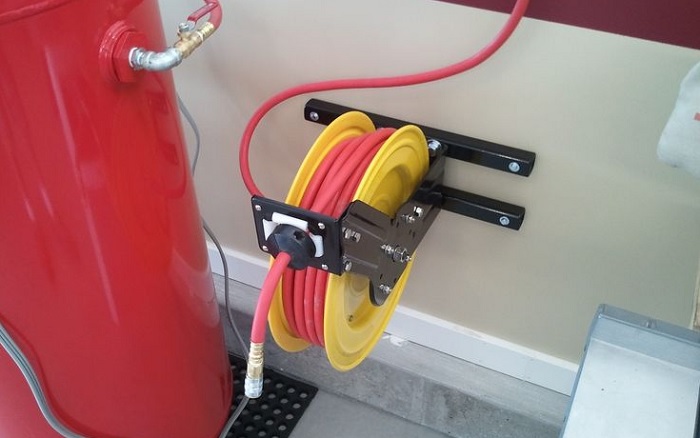
4. Wall Mount: Practical and Easy
Wall mounting the hose reel near your garage door is a practical option, as it is relatively easy to install. However, keep in mind that it might not be the most aesthetically pleasing choice, as a large air hose reel on the wall can stand out. This option is suitable if you prioritize ease of installation and don’t mind the visible appearance.
5. Roller Cart: Portable and Versatile Mounting Option
Consider using a roller cart to mount your air hose reel for a versatile and portable setup. Place the air compressor on the bottom shelf of the cart and attach the reel to the top shelf. This allows you the freedom to wheel the cart and air hose wherever you need it, providing easy access to compressed air for various projects.
6. Kitchen Cabinets: Elevated and Convenient Placement for Arlo Pro
To place the Arlo Pro camera, a great option is on top of the kitchen cabinets, where power outlets are typically scarce. While you could mount the Arlo on the wall, it may lead to unwanted holes later on. Placing it on a flat surface atop the cabinets presents another challenge – the camera might miss lower angles.
Using a Quadpod Mount on the cabinets solves this issue by elevating the Arlo Pro, allowing it to point downward for a better viewing angle of your home. This placement provides an inconspicuous and strategic vantage point for your security camera.
7. In a Tree: Discreet and Secure Position for Arlo Pro
For outdoor security, consider placing the Arlo Pro camera in a tree in your front or back yard. A tree can offer excellent camouflage, covering different angles of your house discreetly. The Quadpod mount’s four legs can wrap around a tree branch, securely holding the Arlo in place.
The silicone material of the Quadpod mount provides a strong grip, ensuring the camera stays steady even on larger branches. Its stability and flexibility make it an ideal choice for securing the Arlo Pro in a tree without any worries of it falling.
These innovative mounting ideas offer practical and creative solutions for placing your air hose reel and Arlo Pro camera, providing convenience and enhanced functionality for your garage and home security needs.
Air Hose Reel Mounting: Recommended Guidelines
Accessibility: Place the hose reel in a location that offers easy access to all areas of your garage and workspace. It should be within reach for quick and efficient use.
Wall Mounting: Opt for wall mounting to save floor space and keep the hose reel out of the way when not in use. You can use a sturdy 2×6 board securely bolted to wall studs to provide a reliable base.
Stud Location: Locate the wall studs in your garage to ensure a strong and stable installation. Using a stud finder will help you identify the best spots to secure the mounting board.
Hose Length: Consider the length of the air hose you need for your projects and choose a reel that accommodates it comfortably. Make sure the hose can reach all corners of your garage without restrictions.
Clearance: Ensure that the area around the hose reel has sufficient clearance, allowing the hose to extend and retract smoothly without obstacles.
Air Compressor Proximity: Position the hose reel in close proximity to your air compressor to minimize pressure drop and ensure efficient air flow.
Height: Mount the reel at an appropriate height, taking into account your comfort and ease of use. Avoid installing it too high or too low to prevent unnecessary strain
Protection from Elements: If your garage is exposed to the elements, consider installing the hose reel in a location that provides some protection, such as under an overhead shelf or against an interior wall.
Safety Measures: Ensure the hose reel is securely mounted and check for any sharp edges or protrusions that could cause injuries during operation.
Mobility: If you have a large workspace or multiple work areas, consider using a retractable reel with a swivel mounting bracket, allowing you to move around freely without detaching the hose.


