When it comes to securing our homes, outdoor surveillance cameras play a vital role in keeping a watchful eye on our property. The Ring Floodlight Camera is a popular choice for homeowners, offering a combination of motion-activated lights and a high-definition camera for enhanced security.
However, to maximize its effectiveness, it’s crucial to carefully consider the mounting options and follow some essential tips.
Ring Floodlight Camera Mounting Options
In this article, we will explore the various Ring Floodlight Camera mounting options available and provide valuable tips to ensure you make the most out of this advanced security solution.
1. Wall Mounting
Wall mounting is the most common and straightforward way to install a Ring Floodlight Camera. It allows you to place the camera on an exterior wall, providing a wide view of the surrounding area. Here are the steps and considerations for wall mounting:
- Junction Box Compatibility: Before starting the installation, ensure that you have a junction box that is compatible with the Ring Floodlight Camera. The camera needs to be securely mounted to the junction box to ensure stability and proper positioning.
- Location Selection: Choose a suitable location on the wall for mounting the camera. Look for an area that offers a clear view of the space you want to monitor. It should also be well-lit to ensure good image and video quality during both day and night.
- Mounting Surface: Verify that the chosen mounting surface is level, sturdy, and capable of supporting the camera’s weight. A secure mounting surface prevents the camera from shaking or swaying due to wind or vibrations.
- Height Consideration: For optimal performance, Ring recommends mounting the Floodlight Camera at a height of approximately nine feet. This height allows the motion sensor to detect movement up to 30 feet away and capture clear images of people’s faces.
- Wiring: Ensure that there is a power source nearby for connecting the camera to a power outlet. If there is no existing electrical wiring, consider hiring a licensed electrician to install the necessary wiring and connect the camera safely.
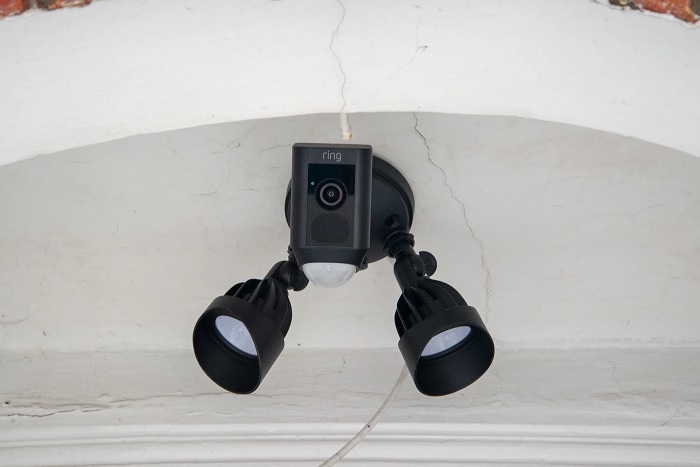
2. Ceiling Mounting
Ceiling mounting is an alternative option for situations where wall mounting might not be suitable, such as when you want to monitor an entryway or driveway from an elevated position. Here are the steps and considerations for ceiling mounting:
- Junction Box and Hole: Like wall mounting, you’ll need a compatible junction box for the Ring Floodlight Camera. However, instead of mounting on a wall, you’ll need to install the junction box in the ceiling. This may require drilling a hole in the ceiling to accommodate the camera.
- Ceiling Strength: Ensure that the ceiling can support the weight of the camera and the junction box. Ceiling mounting might require additional structural support, depending on the ceiling material and the camera’s weight.
- Angle and Coverage: Consider the angle at which the camera will be mounted to get the desired coverage area. An overhead position can provide an excellent view of the surroundings, but be mindful of any potential obstructions or glare.
- Height: While ceiling mounting offers elevated positioning, it’s essential to strike a balance in terms of height. Mounting the camera too high might reduce its effectiveness in capturing clear images of individuals.
- Wiring: Similar to wall mounting, ensure there’s an accessible power source nearby to connect the camera. Professional electrical installation might be required for this purpose.
3. Outdoor Post Mounting
Outdoor post mounting is a suitable option when you want to mount the Ring Floodlight Camera on a freestanding post, such as in a large yard or open space. Here are the steps and considerations for outdoor post mounting:
- Post Size and Strength: Select a post that is at least 4 inches in diameter and made of sturdy material capable of supporting the camera’s weight. Metal or treated wood posts are commonly used for this purpose.
- Drilling Hole: Drill a hole in the post to accommodate the camera securely. Make sure the hole is appropriately sized to allow for a snug fit and prevent any movement or instability.
- Camera Height: Consider the camera’s height when mounted on the post. A suitable height allows for an optimal field of view while maintaining stability.
- Location: Choose the post’s location carefully to ensure it provides the desired coverage area. Post mounting can be advantageous when you want to monitor an area that is not close to any walls or ceilings.
- Wiring: Ensure that there’s a nearby power source for the camera. If there is no electrical infrastructure in the vicinity, professional assistance might be necessary for the wiring.
Ring Floodlight Camera: Overall Tips for Mounting
Lighting and Clear View
Regardless of the mounting option chosen, always prioritize locations with adequate lighting and an unobstructed view of the monitored area. This ensures better image and video quality and improves the camera’s overall performance.
Secure Mounting
Ensure that the camera is securely mounted to the chosen surface, be it a wall, ceiling, or post. A stable mounting prevents the camera from moving or vibrating due to external factors, leading to more reliable recordings.
Height Consideration
Pay attention to the recommended height for mounting the Ring Floodlight Camera. Different mounting options may have varying height considerations to optimize the camera’s motion detection and facial recognition capabilities.
Junction Box Compatibility
Ensure that you have a compatible junction box for the chosen mounting option. The junction box serves as the anchor point for securely mounting the camera.
Wiring and Electrical Safety
Always prioritize safety when dealing with electrical wiring. If you are not experienced in electrical work, it’s best to hire a licensed electrician to handle the wiring and ensure the installation is done correctly.
Test the Camera
After mounting the camera, thoroughly test its functionality to ensure that it is capturing the desired area effectively and working properly.
By carefully considering these mounting options and tips, you can make an informed decision on how to install your Ring Floodlight Camera for optimal performance and security.
Conclusion
In conclusion, the Ring Floodlight Camera is a versatile and effective outdoor security camera solution that can significantly enhance the safety of your home.
By selecting the appropriate mounting option, whether it be wall-mounted or eave-mounted, you can optimize the camera’s field of view and coverage.
Additionally, positioning the camera at the right height and angle will help capture clear and comprehensive footage while minimizing false alerts.


![First Alert Smoke Alarm Chirping Every 40 Seconds [FIXED]](https://homestuffmag.com/wp-content/uploads/2023/04/first-alert-smoke-alarm-chirping-every-40-seconds-211x150.jpg "First Alert Smoke Alarm Chirping Every 40 Seconds [FIXED]")

