The Honeywell T9 is a smart thermostat that syncs with your Smart Room sensors to help you adjust the temperature from anywhere and enjoy a cozy experience in your room. The settings system on the thermostat is easy to follow, but if you’re there are some advanced settings that can be tricky for users.
Honeywell T9 Advanced Settings
In this article, we have provided a guide to Honeywell T9 advanced settings that could improve your experience.
Setting up the Thermostat (for new installation)
- When you turn on the thermostat, tap on “GET STARTED.”
- Follow the instructions and choose the appropriate option for each setting. Tap “NEXT” to move to the next option.
- If you want to see a list of all the setup options, go to “Installer setup (ISU)”. The thermostat will display the ISU name.
- Once you have completed the setup and made your desired settings, tap “Done” in the upper left corner of the display to save everything.
If you have already installed the thermostat and want to view or change settings:
- Tap on the menu icon (three horizontal lines at the bottom of the display).
- Scroll down and tap on “Advanced setup.”
- Then tap on “Modify configuration.”
- Follow the instructions and select the appropriate option for each setting. Tap “NEXT” to move to the next option.
- If you want to see a list of all the setup options, refer to the “Configuration settings” on the next page.
- Once you have finished making changes and adjustments, tap “Done” in the upper left corner of the display to save your settings.
Adaptive Recovery
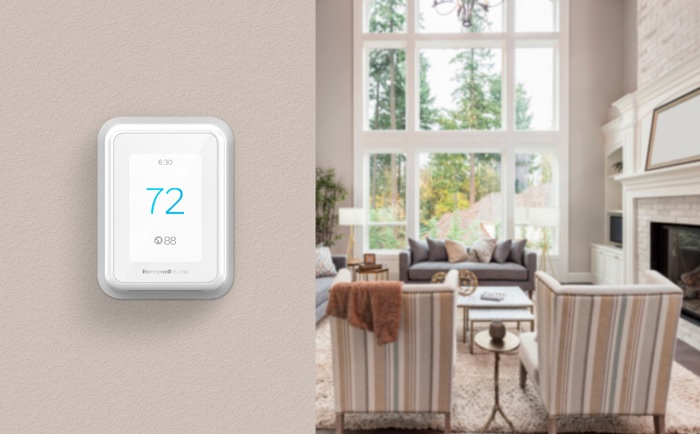
The T9 thermostat learns how long it takes for your heating or cooling system to reach the desired temperature. It starts the system earlier to ensure that the temperature is reached at the scheduled time, regardless of the weather conditions. For example, if you have set the Wake program for 6:30 am with a heat setting of 70 degrees, the heat will turn on before 6:30 am so that the temperature is 70 degrees by that time. The thermostat will show “In Recovery” when it turns the system on early.
Adaptive Intelligent Recovery calculates the recovery time based on the difference between the current room temperature and the desired temperature, as well as the previous performance of the system and weather history. This allows the thermostat to start the recovery process at the optimal time, ensuring that the programmed temperature is reached at the scheduled time.
Compressor Protection
To prevent damage to the equipment, the thermostat keeps the compressor off for a few minutes before restarting. During this time, the thermostat will display the message “Waiting for Equipment” on the screen.
Adding a Wireless Sensor
- Tap anywhere on the thermostat’s display to wake it up.
- Tap the MENU icon at the bottom of the screen.
- Scroll down and tap on “Devices and Sensors.”
- Tap “Add.”
- Follow the instructions on the screen to pair and name your new sensor.
Removing a Sensor from the T9 (using the thermostat)
- Tap anywhere on the thermostat’s display to wake it up.
- Tap the MENU icon at the bottom of the screen.
- Scroll down and select “Devices and Sensors.”
- Choose the sensor you want to remove. Tap the “Options” button at the bottom of the screen.
- Tap “Delete.”
Removing a Sensor from the T9 (using the sensor)
- Find the sensor you want to remove from your thermostat.
- Remove the sensor cover and check the battery placement.
- With the cover off, press and hold the Connect button for 30 seconds. (The sensor LED will change from steady green to red.)
- Release the Connect button. Your sensor will now be removed from the “Devices and Sensors” list.
Note: If a sensor was previously paired with another T9 Smart thermostat, you need to remove it from the previous thermostat before pairing it with your new T9 Smart thermostat. Sensors can only be compatible with one thermostat at a time.
Schedule override on Device
If the thermostat is set to heat, cool, auto, or heat mode, you can change the temperature setting by pressing the up or down arrow. If the thermostat is in auto mode, you need to press either “heat to” or “cool to” first. If scheduling is enabled, it will show “Hold until” with a time displayed at the bottom of the screen. Tap on it. The display will give you options:
- Next Period
- A Specific Time
- Permanently
- Remove hold
Choose the option that suits your needs. If you select “A Specific Time,” choose the time you want to hold the temperature until. Press “Done” to go back to the Home screen.
Setting a Schedule for the Thermostat
- Tap on the menu icon at the bottom of the Home screen. Then select “Schedule.”
- If you want the same schedule for all days, choose “grouped days.”
- Tap on the period you want to edit (Wake, Away, Home, or Sleep).
- If you want weekdays to have the same schedule but separate from the weekend days, or if you don’t want to use a schedule at all, select “Schedule.”
- Tap on “Create New Schedule.” The thermostat will guide you through the setup process.


