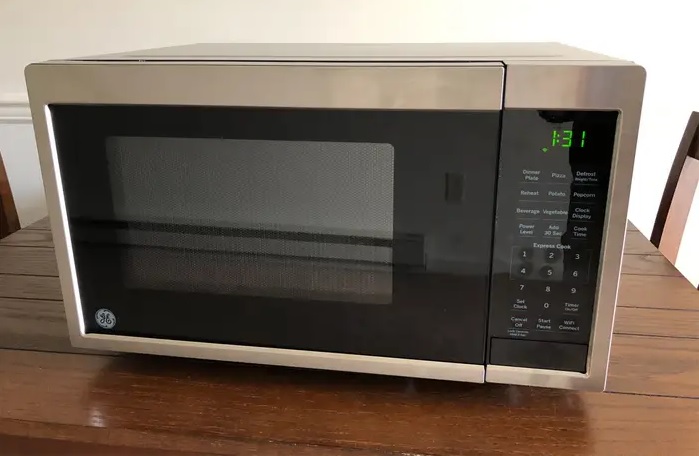
GE Microwave is a trusted brand known for its innovative appliances that tend to be reliable almost every time. However, microwaves are not without issues, like a blown fuse, which can stall their functionality.
In this article, you will learn how to locate the fuse in the GE Microwave as well as make a replacement.

GE Microwave Fuse Location & Replacement Guide
Locating the Fuse
Before we dive in, it is highly recommended to unplug your microwave and proceed with caution while attempting any repairs.
- Exterior Inspection: Let’s start with the basics. The GE microwave fuse is generally located inside the microwave cabinet. Begin by visually inspecting the exterior of your microwave. Look for visible screws or clips that hold the outer casing in place.
- Accessing the Fuse Compartment: Once you have identified the area, carefully remove the cover using a screwdriver or pry tool.
- Inner Casing Removal: With the outer casing removed, you will gain access to the internal components of the microwave.
- Locating the Fuse: Now, with the inner casing exposed, you will likely find a complex network of wires, connectors, and circuit boards. The fuse is a small cylindrical or rectangular component and should be positioned near the power input area. The power cord connects to the fuse, providing protection against electrical surges.
- Identifying the Fuse: GE microwaves usually employ ceramic fuses, which appear as small cylinders with metal ends. These fuses are designed to break or blow when exposed to excessive electrical current, thereby safeguarding the microwave’s internal circuitry.
Replacing the Fuse in a GE Microwave
Follow this guide to replace a fuse in a GE microwave
- Take off the vent grille. The vent grille is typically located at the top of the microwave and secured with a couple of screws on the upper surface. Remove the screws and slide the grille to unhook the plastic tabs (usually left or upward). Set the grille aside and remember where each screw belongs.
- Disconnect the control panel. Look for screws on the side of the control panel that are now visible after removing the grille. Also, remove any screws on the upper surface of the panel. Lift the control panel and gently pull it forward to detach it. Keep it propped up securely without unplugging any wires.
- Remove outer panels if needed. Now you have access to some parts of the microwave’s interior. You can inspect for electrical issues at this stage, or you can unscrew and remove the remaining panels to gain full access.
Discharging the capacitor in a GE microwave
Before you attempt to touch the electrical components of the microwave, you might want to discharge the capacitor
- Wait for several minutes. It’s important to let the microwave sit unplugged to allow the capacitor to discharge. This can take a few minutes, as the charge needs time to drain. However, always make sure the microwave is unplugged before proceeding.
- Find the capacitor. Look for a metal cylinder with two or three electrical terminals. If you’re unsure where it is, it’s best to call a professional repairman. Avoid taking apart any interior components to search for it.
- Avoid touching any part of the inverter board that contains the capacitors, such as the aluminum heat sink, windings, and choke coil. These parts carry high voltage.
- Use a screwdriver with an insulated handle. It’s also a good idea to wear insulated gloves if you’re unsure about the voltage rating of the screwdriver handle. Voltages up to 5000 volts may be present.
- Attach a resistor to the screwdriver tip. Clip a 100K Ω resistor with a rating of 25 watts or higher to the blade of the screwdriver. This will slow down the discharge process and protect your screwdriver and microwave components.
- Connect the other end to the metal chassis. Use an alligator clip to attach the other end of the resistor to the metal chassis of the capacitor. Wearing insulated gloves during this step can help avoid contact with the capacitor’s terminals.
- Touch the screwdriver tip to one terminal of the capacitor. Hold it in place for a few seconds to allow the charge to drain. Also, you may discharge at the magnetron filament terminal, as stated in the GE service manual for a JES series microwave.
- Repeat the process with the other terminal. Make sure the clip is still grounded, and then touch the screwdriver tip to the other terminal. If there is a third terminal, repeat the process for that one too.
- Check for any remaining charge. Remove the screwdriver and unclip the resistor. Touch the screwdriver tip to one terminal and then slide it to the other. If you hear a popping noise or see a spark, it means the capacitor hasn’t discharged completely. The voltage should be gone by now, but to be safe, drain each terminal to the ground once again. Avoid using a standard multimeter to test for voltage, as they are not designed to handle the high voltage in microwaves.
Making the Replacement
- Start by checking for obvious issues. When a fuse blows, it’s often a sign of an electrical problem. Look for scorch marks, debris causing a short circuit, or broken/leaking components. If you notice any of these, it’s likely that additional parts besides the fuse will need to be replaced or repaired.
- Safely remove the fuses. Use a fuse puller or the insulated handle of a screwdriver to pop out the fuses. For thermal fuses, detach the wires from the prongs. Remember where each fuse came from.
- Test the fuses with a multimeter. Blown microwave fuses may not appear visually different. To test them:
- Set your multimeter dial to the continuity test (represented by the symbol ))) if available, or the lowest Ohm setting otherwise.
- Touch the two probes together. You should hear a tone or see a reading of 0 Ohms on the multimeter.
- Touch the two probes to opposite ends of the fuse.
- If the multimeter displays 0 Ohms or you hear a continuity tone, the fuse is working. If it shows resistance, “OL” (overload), or no continuity tone, the fuse is blown.
- Replace the fuse with an identical one. Ensure that the replacement fuse is the same size and has the same amperage rating as the original. You can find this information on the fuse itself (you may need a magnifying glass to read it). Use a fuse puller or insulated gloves to insert the new fuse.
- It’s a good idea to have a couple of spare fuses. If there’s an underlying electrical problem, the new fuse might blow as well.
- Reassemble the microwave. Put back all panels and screws in the opposite order you removed them. Check that the tabs around the panels fit securely without pinching any wires. Proper reassembly is crucial to prevent radiation leakage during operation. Ensure all screws are in their original positions, as some are responsible for grounding the cover.
- Never plug in or run the microwave until it’s fully assembled. To test it, place something inside the microwave to avoid overheating.
![Dishwasher Leaking From Bottom When Not Running [Fixed] Dishwasher Leaking From Bottom When Not Running [Fixed]](https://homestuffmag.com/wp-content/uploads/2023/04/dishwasher-leaking-from-bottom-211x150.jpg)


