Looking to take your TV entertainment on the road? Wondering how to mount and position your Dish Playmaker for the best satellite signal? Look no further!
In this article, we’ll explore some important Dish Playmaker mounting options and share some fantastic tips to ensure you never miss a moment of your favorite shows, even while traveling.
Dish Playmaker Mounting Options
The Dish Playmaker can be mounted on a variety of surfaces, including roofs, windows, and tripods. The specific mounting method you choose will depend on your individual needs and preferences.
Here are some mounting options and tips:
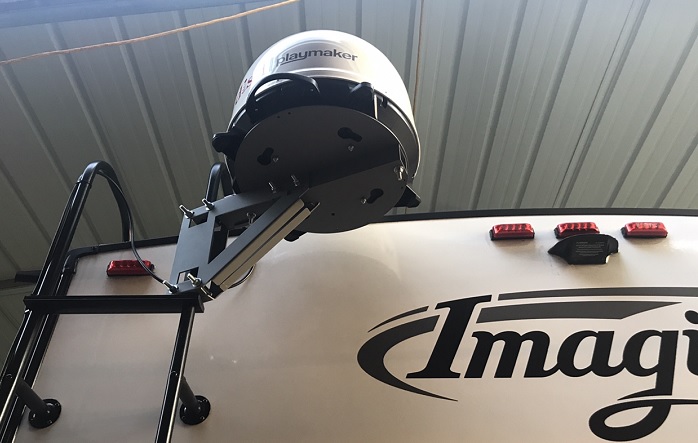
1. On The Roof Of A Car Or Rv:
This is the most common mounting option for the Dish Playmaker. The receiver can be mounted to the roof using a variety of methods, including suction cups, magnets, or brackets. Be sure to choose a mounting method that is compatible with your vehicle and that will provide a secure hold for the receiver.
If you are mounting the Dish Playmaker on the roof of a car or RV, you will need to use a roof mount kit. These kits typically include mounting feet, a cable entry plate, and hardware. The roof mount kit will allow you to secure the Dish Playmaker to the roof of your vehicle in a way that is both secure and weatherproof.
2. Inside a vehicle
The Dish Playmaker can also be mounted inside a vehicle, such as on the dashboard or the back of a seat. This is a good option if you do not want to mount the receiver on the roof of your vehicle.
However, it is important to make sure that the receiver has a clear view of the southern sky in order to receive a signal.
3. On a tripod
The Dish Playmaker can also be mounted on a tripod. This is a good option if you want to be able to move the receiver around easily.
However, it is important to make sure that the tripod is sturdy enough to support the weight of the receiver. If you are mounting the Dish Playmaker on a tripod, you will need to use a tripod mount kit.
These kits typically include a mounting bracket, screws, and a tripod. The tripod mount kit will allow you to secure the Dish Playmaker to a tripod in a way that is both secure and portable.
4. Window Mount
Some Dish Playmaker models offer window mounts, which can be attached to the inside of a window using suction cups or adhesive pads. This option is convenient if you don’t want to mount the antenna permanently on the roof.
If you are mounting the Dish Playmaker on a window, you will need to use a window mount kit. These kits typically include a mounting bracket, screws, and adhesive.
The window mount kit will allow you to secure the Dish Playmaker to the window of your vehicle in a way that is both secure and removable.
5. Portable Mounting Kits
Some manufacturers offer portable mounting kits with various mounting options, including ladder mounts and pole mounts. These kits are designed to make the installation process easier and more flexible.
No matter which mounting method you choose, it is important to follow the instructions carefully to ensure that the Dish Playmaker is mounted correctly. This will help to prevent damage to the antenna and ensure that you are able to receive a clear signal.
Tips for mounting and using the Dish Playmaker
Mounting and using the Dish Playmaker satellite antenna requires careful consideration and attention to detail to ensure optimal performance and longevity. Here’s a step-by-step guide that explains the process in detail:
Pre-Installation Planning
- Before starting, identify the best location for mounting the Dish Playmaker. Look for a spot with a clear line of sight to the satellite to ensure maximum signal reception. Avoid placing the antenna under trees, buildings, or any other obstructions that could block the signal.
- Choose a location that provides a stable surface for mounting, such as the roof of your RV or a flat surface on the ground. Make sure the chosen spot allows easy access for cable connection and maintenance.
Cable Management
- When installing the Dish Playmaker, take care of cable management. Secure the coaxial cable properly to prevent it from dangling or snagging on objects during travel. Use cable clips or ties to keep the cable neatly organized and protected.
- Leave some slack in the cable near the antenna and at the entry point to your RV to allow for movement and flexibility without straining the connections.
Signal Test
- Before finalizing the mounting location, perform a signal test to find the best spot for the antenna. Connect the Dish Playmaker to your satellite receiver and use a satellite signal meter or the signal strength indicator on your receiver.
- Rotate the antenna to different positions and angles while monitoring the signal strength. The goal is to find the position with the highest signal quality. Patience is essential during this step, as slight adjustments can make a significant difference in reception.
Mounting the Dish Playmaker
- Follow the manufacturer’s instructions for mounting the Dish Playmaker securely. Use appropriate mounting brackets and hardware to ensure stability.
- If you are mounting the antenna on the roof of your RV, take appropriate safety precautions. Use a sturdy ladder, and have someone assist you during the installation process for added safety.
Securing the Antenna
- Double-check all the mounting points and connections to ensure everything is secure. Ensure that the Dish Playmaker is tightly fastened to the mounting surface to prevent it from shifting or falling during travel.
Regular Maintenance
- Make it a habit to inspect the Dish Playmaker regularly. Check the mounting brackets, cables, and connectors for any signs of wear or damage.
- Look for signs of rust, corrosion, or loose connections, and address any issues promptly to maintain optimal performance.
Weather Protection
- To prolong the life of your Dish Playmaker, consider weather protection. If possible, install a weatherproof cover or housing to shield the antenna from rain, snow, and harsh environmental elements when not in use.
Familiarize yourself with Receiver Settings
Get familiar with the satellite receiver settings and setup process. Understand how to perform a satellite scan and tune in to your preferred channels. If you’re new to using satellite antennas, consult the user manual or seek guidance from customer support.
By following these detailed steps and adhering to the manufacturer’s guidelines, you can ensure that your Dish Playmaker performs optimally and provides you with a reliable satellite TV experience while you’re on the road.
Which way do I face my Dish Playmaker?
To achieve the best satellite signal reception with the Dish Playmaker, you should generally face the front of the antenna towards the southern sky in the Northern Hemisphere and towards the northern sky in the Southern Hemisphere. This is because most geostationary satellites, which provide satellite TV signals, are positioned above the equator.
Specifically, in the Northern Hemisphere (e.g., in the United States, Canada, Europe), you should face the front of the Dish Playmaker towards the south. In the Southern Hemisphere (e.g., Australia, New Zealand, and parts of South America), you should face it towards the north.
Conclusion
In conclusion, mounting and using the Dish Playmaker can open up a world of entertainment possibilities while you’re on the move. With a clear line of sight to the satellite, proper cable management, and regular maintenance, you can enjoy uninterrupted TV viewing wherever your adventures take you.


