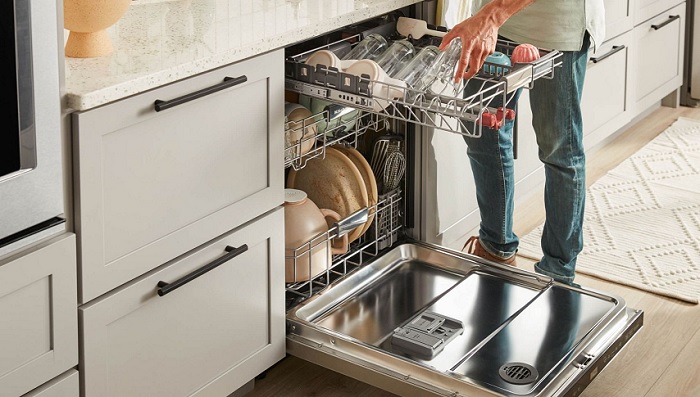
If you notice a problem with your Kitchenaid Dishwasher, but you’re having a hard time figuring out what it actually is, the diagnostic mode would help you out.
This mode runs a check on the dishwasher and identifies why it is not functioning properly. When done, it will display an error code to indicate the problem.
In this guide, we have provided the steps to run the KitchenAid dishwasher diagnostic mode based on your dishwasher model.
Kitchenaid Dishwasher Diagnostic Mode Explained
To enter diagnostic mode on certain KitchenAid dishwasher models (such as W10142800B, 8572216, or W10130990C), follow these steps:
- Make sure your dishwasher is plugged in but not powered on (standby mode).
- Find the Heated Dry and Normal cycle buttons.
- Quickly press the Heated Dry button and then the Normal cycle button.
- Repeat step 3 by pressing the Heated Dry and Normal buttons in the same order.
- Within about 6 seconds, the dishwasher should enter service mode.
Also, for the KitchenAid 8572216 dishwasher, you can also enter service mode by unplugging the thermistor twice after unplugging the user interface.
To put the KitchenAid KUDD03DT dishwasher into diagnostic mode, follow these steps:
- Make sure the dishwasher is in standby mode.
- Press the ‘High Temp Wash’ key six times consecutively.
- Press the ‘start’ button to initiate service mode.
- It is important to complete these steps within a 10-second timeframe, so act quickly. Additionally, ensure that you have clean water in the dishwasher to ensure accurate sensor functionality.
Here are some important points to keep in mind when conducting this test:
- If there is an error code, the ‘cancel’ LED light will flash. from the display, press any key after the ‘Cancel’ LED flashes with an error code. Remember to note down the fault code before clearing it.
- If you want to pause the sequence during the test, simply open the dishwasher door. To resume the sequence, close the door again.
To enter diagnostic mode on the KitchenAid W10195615A dishwasher, follow these steps:
- Ensure the dishwasher is in standby mode.
- Quickly press the first three keys (keys 1, 2, and 3) one after another.
- Repeat step 2, pressing the three sets of keys again with a one-second interval between each press.
- Press the three keys one more time to initiate the diagnostic mode. Please note that the dishwasher will only start the test once you close its door. Therefore, make sure to close the door before pressing the cycle keys.
To activate service mode on the KitchenAid KIDS01EK dishwasher, follow these straightforward steps:
- Place the dishwasher in standby mode.
- Quickly press the Rinse-Only and SANI Rinse Keys.
- Press the Rinse-Only and SANI Rinse Keys again in rapid succession to enter diagnostic mode.
- Allow the dishwasher some time to display any error code.
To activate service mode on the KitchenAid 8537797 dishwasher, follow these simple steps:
- Ensure the dishwasher is in standby mode.
- Press the High-Temp Scrub button.
- Shortly after, press the Air Dry switch.
- Press both the High-Temp Scrub and Air Dry buttons once more. Please note that you can substitute High-Temp Scour or Power Scour for High-Temp Scrub, and Energy Saver Dry or No Heat for Air Dry. The dishwasher will enter service mode regardless of which option you choose. In addition, you can initiate the diagnostic by pressing SANI Rinse and Air Dry instead of High-Temp Scrub and Air Dry. If SANI Rinse is not available, press Energy Saver Dry or No Heat Dry.
For diagnostic purposes on the KitchenAid KUDR245EWH5 dishwasher, follow these steps:
- Make sure the dishwasher is in standby mode.
- While in standby mode, press both the High-Temp Wash and Energy Saver Dry buttons.
- Repeat the action of pressing both buttons within a time frame of 10 seconds. Also, you can press the High-Temp Wash button three times consecutively, as long as all actions are completed within 10 seconds.
KitchenAid Dishwasher Error Codes & Fixes
All Cycle Buttons or Options Flashing: The dishwasher door is not properly closed.
- Recommendation: Close the dishwasher door securely and reset it.
Flashing Clean Light: Water supply is disconnected, the float is stuck, or there are excessive suds.
- Recommendation: Check the water supply connection, press down on the float, reduce detergent usage, and reset the dishwasher.
Control Lock (Red Indicator): Control Lock is activated.
- Recommendation: Disable Control Lock by pressing and holding the buttons for 3 seconds.
Blinking/Flashing Lights: The dishwasher door is open, there is a power disruption, or Delay Start is enabled.
- Recommendation: Close the dishwasher door, ensure power is uninterrupted, and disable Delay Start. Reset the dishwasher afterward.
Flashing Rinse-Only Light: Some keys are stuck.
- Recommendation: Gently press the stuck keys to release them and reset the dishwasher.
Flashing Sanitize Light: Dishes were not properly sanitized (incorrect temperature).
- Recommendation: Set the sanitization temperature to at least 49°C/120°F and reset the dishwasher.
F1E1/CODE 1-1: A relay is stuck.
- Recommendation: Reset the dishwasher, and if the problem persists, replace the Electronic Control Board (ECB).
F1E2/CODE 1–2: Faulty ECB memory.
- Recommendation: Reset the dishwasher.
F2E1/2-1, F3E1/3-1, or F383/3-3: A control panel key is stuck or faulty.
- Recommendation: Check the control panel buttons for any stuck keys. If buttons are faulty, seek professional assistance.
F4E3: The dishwasher needs to be reset.
- Recommendation: Reset the dishwasher.
F2E2 (CODE 2-2): The dishwasher needs to be reset.
- Recommendation: Reset the dishwasher.
F6E3: Excessive suds or incorrect detergent usage.
- Recommendation: Use the correct detergent and avoid using too much of it.
F6E4: The dishwasher is not leveled properly.
- Recommendation: Ensure the dishwasher is leveled correctly.
F10E5/FAE5: The current cycle has completed.
- Recommendation: Cancel the ongoing cycle and start a new one.
F6E1: The dishwasher does not start.
- Recommendation: Reset the dishwasher.
F8E4: Incorrect dishwasher installation.
- Recommendation: Review the installation instructions to ensure proper installation.
F8E5: Drain sequence issue.
- Recommendation: Turn on the dishwasher’s water supply or power off the dishwasher.
CODE H2O: Water supply has failed.
- Recommendation: Check the water supply tube for proper connection and remove any kinks.


