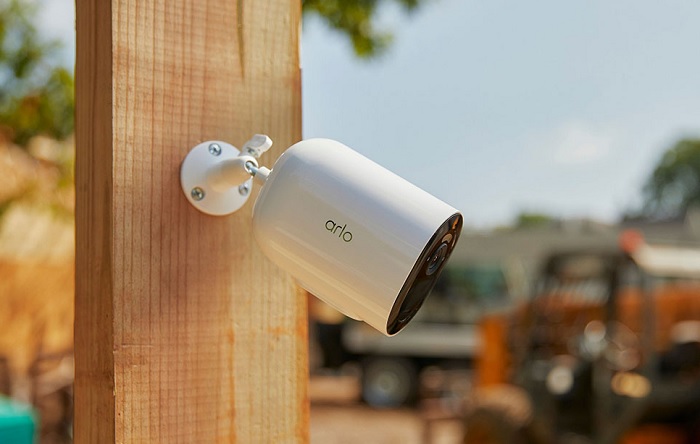
Finding the right placement for your Arlo camera is crucial to ensure effective motion capture, clear video recordings, and strong signal strength. Each household and environment may have unique considerations, so understanding camera positioning is essential to get the most out of your Arlo camera system.

Arlo Camera Mounting: Positioning Tips
1. Maintain Adequate Clearance
Avoid placing objects too close to your Arlo camera. Objects like walls, light fixtures, or eaves within 2.5 inches (6.4 cm) of the camera’s sides or front can cause glare or hazy video, especially during nighttime recordings.
2. Elevate the Camera
For optimal sensor performance, mount your Arlo camera at a height of at least 7 feet (2 meters). Aim it slightly downward to capture the best footage. For Arlo floodlights and doorbells, refer to the user manual for specific height tips.
3. Consider the Angle
Adjust the camera angle to detect motion in the desired areas effectively. If you want to detect motion closer to the camera, such as visitors at your front door, position the camera at least 7 feet high and aim it so that visitors appear in the lower two-thirds of the image. This setup helps avoid unnecessary motion alerts for activities in the top third of the image, like passing vehicles.
When aiming to detect motion across a larger area, such as a spacious lawn or backyard, it’s essential to adjust the camera placement strategically. By aiming the camera higher, you can effectively frame the targeted region within the lower two-thirds of the image, enabling broader coverage and enhanced motion detection capabilities over an extended distance.
Expanding on this technique, elevating the camera not only widens the surveillance area but also optimizes the field of view. As a result, your Arlo camera can efficiently capture movements occurring at a distance while still maintaining clarity and accuracy in the recorded footage.
Adapting the camera angle to suit your specific monitoring needs empowers you to fine-tune the surveillance setup for comprehensive coverage. Whether it’s keeping an eye on a vast lawn, a backyard, or a sizeable property, this approach ensures that potential motion triggers are within the camera’s targeted range, reducing the risk of missed events.
4. Point Your Camera at Important Areas
To optimize your Arlo camera’s motion detection feature and conserve battery life, ensure that the camera is not facing busy areas like a bustling street.
The camera’s AI may trigger repeatedly due to passing cars, leading to unnecessary power consumption. Adjust the field of view to point the camera away from such high-activity regions, focusing instead on crucial areas that require surveillance.
5. Consider Side-to-Side Traffic
Arlo’s motion sensor is more sensitive to side-to-side movement within its field of view rather than movements directly toward or away from the camera. Take this into account when positioning the camera to prioritize detecting lateral movements effectively, which can be crucial for identifying potential threats or activities of interest.
Arlo Camera Mounting: Tips for Optimal Wi-Fi Signal Strength
1. Check Signal Strength
In the Arlo Secure app, monitor the number of bars indicating the performance of your Wi-Fi signal. Ensure that your cameras show three or four bars of signal strength in the intended placement area. Although cameras can function with one or two bars, fluctuations in the environment may cause them to go out of range intermittently.
2. Ensure Proximity to Wi-Fi Router
If your signal strength is poor, your Wi-Fi router may be too far from the Arlo camera. Try relocating the camera closer to the router or consider using a Wi-Fi extender or mesh network to enhance connectivity. Reach out to your internet service provider or router manufacturer for further assistance.
3. Consider Mobile Coverage for Arlo Go Series
For mobile cameras like the Arlo Go series, select an installation location with good mobile coverage. A stable LTE connection is essential for reliable performance. Refer to Arlo’s resources for optimizing LTE connectivity for Arlo Go cameras.
4. Optimize Router, Base Station, or SmartHub Placement
The signal range may be impacted by walls, ceilings, or other obstructions between the camera and its Wi-Fi source. Materials such as unusually thick walls, brick, concrete, stucco, stone, ceramic, glass (especially mirrors), metal, and large amounts of water can reduce signal strength significantly.
Optimize the placement of your Wi-Fi router, SmartHub, or Base Station to minimize obstacles that hinder signal transmission.
5. Mind the Distance
Ensure that the camera is at least 10 feet away from your Wi-Fi router, SmartHub, or Base Station, and at least 6.5 feet away from other Arlo devices. Maintaining adequate distances helps maintain strong and stable Wi-Fi connections.
6. Verify Arlo’s Minimum Requirements
Ensure that your home Wi-Fi network and mobile device meet Arlo’s minimum requirements for smooth operation and reliable connectivity. Consult Arlo’s resources for detailed information on system requirements.
7. SmartHub/Base Station Range
If your camera is connected to an Arlo SmartHub or Base Station, confirm that it is within 300 feet (90 meters) of the SmartHub or Base Station. Keep in mind that the range of 300 feet can be reduced by any walls or obstructions between the camera and the SmartHub/Base Station.
To mount your Arlo Essential wire-free camera, follow these steps:
- Place the screw mount on the wall or ceiling where you intend to mount your camera.
- Mark the location of the three holes from the mount on the wall or ceiling. These marks can be used as a guide to drill pilot holes.
- Remove the screw mount from the wall.
- Use a power drill with a 15/64 inch (6mm) drill bit to drill three holes into the wall at the marked locations.
- Place the screw mount back onto the wall, aligning it with the three holes.
- While holding the screw mount over the three holes, use a Phillips-head screwdriver to fasten a screw into each hole, securing the mount to the wall.
- Screw your Arlo Essential wire-free camera clockwise into the screw mount.
- Tilt and swivel the camera to adjust its angle as needed.
- Twist the thumb screw and grip clockwise to tighten the camera’s position securely.
Ensure that you have followed the installation instructions provided in the Arlo app before starting the mounting process. It’s crucial to find a suitable location for optimal signal strength and motion detection. Use the recommended drill bit size and wall anchors when mounting on drywall, brick, or tile for added stability.
By following these strategic camera placement tips and optimizing Wi-Fi signal strength, you can ensure effective motion detection, extended battery life, and seamless performance for your Arlo camera system. A well-positioned camera with strong connectivity offers enhanced security and peace of mind for your home or property.


![First Alert Smoke Alarm Chirping Every 40 Seconds [FIXED] First Alert Smoke Alarm Chirping Every 40 Seconds [FIXED]](https://homestuffmag.com/wp-content/uploads/2023/04/first-alert-smoke-alarm-chirping-every-40-seconds-211x150.jpg)

