If your First Alert Smoke Alarm detected a fire and alerted you, you might be wondering how to turn it offer after you’re out of harm’s way. Or maybe you want to turn it off while performing maintenance. Regardless of your reason for doing so, it is not recommended to turn off smoke alarms for any other reason aside from maintenance.
How to Turn Off First Alert Smoke Alarm
Now, let’s get started on how to turn off the First Alert smoke alarm.
Step 1: Locate the smoke alarm
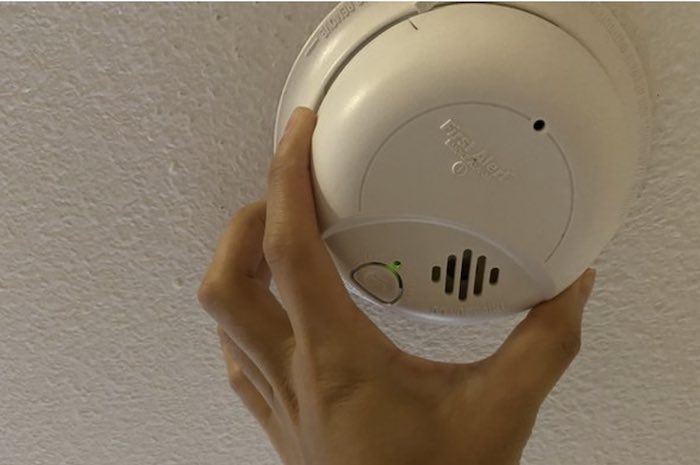
The first step in turning off a First Alert smoke alarm is to locate it. Smoke alarms are usually installed on the ceiling or high up on the wall, and are often located in hallways, bedrooms, and other areas where people spend a lot of time. If you have multiple smoke alarms in your home, you’ll need to locate the one that’s making the noise.
Step 2: Identify the type of alarm
First Alert smoke alarms come in different types, such as ionization, photoelectric, and combination alarms. The type of alarm you have will determine how you turn it off.
For example, if you have an ionization alarm, it will likely have a small button on the front that you can press to silence the alarm. If you have a photoelectric alarm, it may have a hush feature that allows you to temporarily silence the alarm by pressing and holding a button on the front. Combination alarms may have both features.
Step 3: Press the silence button or use the hush feature
Once you’ve located the smoke alarm and identified its type, you can proceed to turn it off. If your alarm has a silence button, simply press it once to silence the alarm. If your alarm has a hush feature, press and hold the button on the front of the alarm for several seconds until the alarm stops sounding.
It’s important to note that silencing the alarm using either method will only turn off the alarm for a short period of time, usually around 8-10 minutes. After that, the alarm will begin sounding again if it detects smoke or fire.
Step 4: Check for smoke or fire
Once you’ve turned off the smoke alarm, it’s important to check for smoke or fire. If you see or smell smoke, or if you see flames, leave the area immediately and call 911.
If you don’t see or smell smoke, it’s possible that the alarm was triggered by something else, such as steam from a shower or cooking. In this case, you can open a window or use a fan to clear the air and prevent the alarm from sounding again.
Step 5: Reset the smoke alarm
After you’ve checked for smoke or fire and determined that it’s safe to do so, you should reset the smoke alarm. To do this, simply locate the reset button on the front of the alarm and press it. This will reset the alarm and it will begin monitoring for smoke and fire again.
It’s important to note that if the smoke alarm continues to sound after you’ve attempted to turn it off, or if it sounds again shortly after you’ve silenced it, it may be a sign that there is smoke or fire present in your home. In this case, you should evacuate immediately and call 911.
How to Test First Smoke Alarm
Testing your smoke alarm is a crucial step in ensuring that your home and family are safe in the event of a fire. The smoke alarm is designed to detect smoke and sound an alarm, giving you time to evacuate your home and contact emergency services. However, if your smoke alarm isn’t working properly, it won’t provide the protection you need.
Here’s an in-depth guide on how to test your smoke alarm:
Step 1: Locate your smoke alarm
Once again you will have to locate the smoke alarm. If you installed the smoke alarm yourself, it should be easy to locate.
Step 2: Alert your family members
Before you begin testing your smoke alarm, it’s important to let your family members know that you’ll be doing so. The sound of the smoke alarm can be loud and jarring, so it’s best to give everyone a heads up to avoid any unnecessary panic.
Step 3: Test the smoke alarm
Now it’s time to test the smoke alarm. Most smoke alarms have a “test” button that you can press to check if it’s working properly.
To test the smoke alarm, simply press and hold the “test” button until you hear the alarm sound. If the alarm doesn’t sound, there may be an issue with the battery or the smoke alarm itself.
Step 4: Check the battery
If the smoke alarm doesn’t sound when you press the “test” button, the first thing to check is the battery. Many smoke alarms are powered by a 9-volt battery, and if the battery is dead or low, the smoke alarm won’t work properly.
To check the battery, simply remove the smoke alarm from the ceiling or wall and look for the battery compartment. If the battery is dead or low, replace it with a fresh one.
Step 5: Clean the smoke alarm
If the smoke alarm still isn’t working properly after replacing the battery, it may be dirty or dusty. Smoke alarms can become clogged with dust and debris, which can interfere with their ability to detect smoke.
To clean the smoke alarm, you can use your vacuum or get a soft brush to remove any dust or debris from the sensors. Make sure not to press too hard or use any liquids, as this can damage the smoke alarm.
Step 6: Test again
Once you’ve replaced the battery and cleaned the smoke alarm, it’s time to test it again. Press the “test” button and listen for the alarm to sound. If it still doesn’t sound, there may be an issue with the smoke alarm itself, and it’s time to replace it.
Step 7: Replace the smoke alarm
Smoke alarms typically last for about 10 years, after which they should be replaced. If your smoke alarm is more than 10 years old or if it’s not working properly even after replacing the battery and cleaning it, it’s time to replace it with a new one.
When replacing your smoke alarm, make sure to choose one that meets current safety standards and regulations. Look for smoke alarms that are certified by an independent testing laboratory and have a hush feature that allows you to silence the alarm in case of a false alarm.


![First Alert Smoke Alarm Chirping Every 40 Seconds [FIXED]](https://homestuffmag.com/wp-content/uploads/2023/04/first-alert-smoke-alarm-chirping-every-40-seconds-211x150.jpg "First Alert Smoke Alarm Chirping Every 40 Seconds [FIXED]")