If you’re experiencing a Liftmaster wall control blinking slowly, don’t panic! This issue is relatively common and can be fixed with a few simple steps.
In this article, we’ll go over everything you need to know about this problem, including what causes it and how to fix it.
What Causes the Liftmaster Wall Control to Blink Slowly?
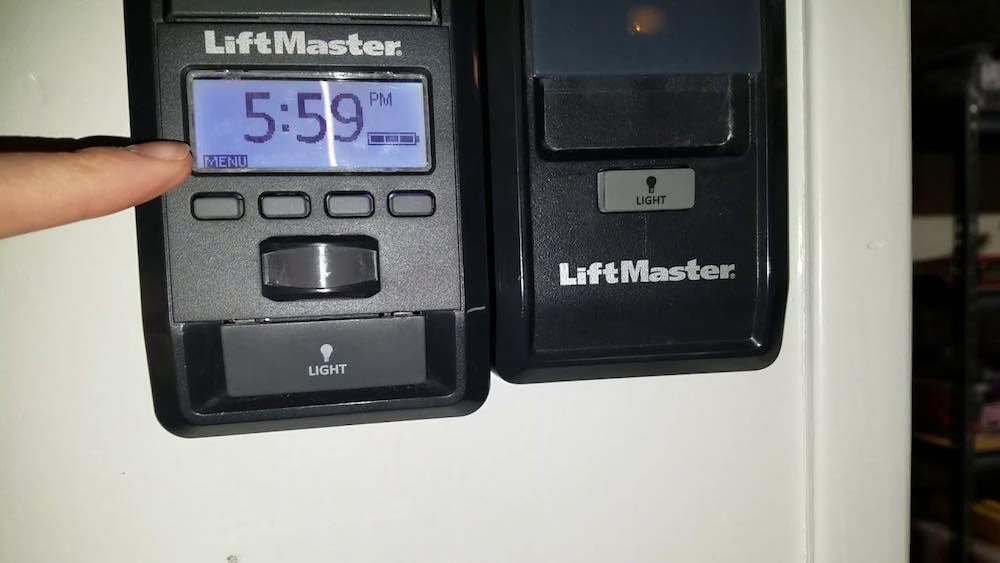
Before we dive into the solutions, it’s essential to understand why your Liftmaster wall control is blinking slowly in the first place. The primary reason for this issue is a disruption in communication between the wall control and the garage door opener.
This disruption can be caused by a few different factors, including:
- Dead Batteries: If the batteries in your wall control are dead or low, it may struggle to communicate with the garage door opener, resulting in a slow blinking light.
- Electrical Interference: Sometimes, other electronic devices in your home can interfere with the communication between the wall control and the garage door opener, causing a slow blinking light.
- Faulty Wiring: If the wiring between the wall control and the garage door opener is damaged or disconnected, it can cause communication issues and result in a slow blinking light.
Liftmaster Wall Control Blinking Slowly: How to Fix
Now that you know what can cause this issue let’s get into how to fix it.
Solution 1: Replace the Batteries
If the slow blinking light on your wall control is caused by dead or low batteries, the solution is simple: replace them! Follow the steps below to replace the batteries
- Locate the battery compartment on the back of your wall control.
- Use a small screwdriver to remove the cover of the battery compartment.
- Remove the old batteries and dispose of them properly.
- Insert new batteries into the battery compartment, making sure to match the polarity correctly.
- Replace the battery compartment cover.
- Test your wall control to see if the slow blinking light has been resolved.
Solution 2: Check for Electrical Interference
If you’ve replaced the batteries and the slow blinking light persists, the next step is to check for electrical interference. To do this, follow the steps below:
- Turn off any electronic devices in your home that could be causing interference, such as TVs or radios.
- When done, you should test the wall control to see if the slow blinking light has been resolved.
- If the slow blinking light persists, try moving the wall control closer to the garage door opener. This can help to reduce the impact of any interference.
- If moving the wall control closer to the garage door opener doesn’t work, you may need to install a garage door opener repeater to amplify the signal between the wall control and the garage door opener.
Solution 3: Check for Faulty Wiring
If neither of the above solutions works, there may be an issue with the wiring between the wall control and the garage door opener. Here’s how to check:
- Turn off power to your garage door opener by unplugging it or turning off the circuit breaker.
- Remove the wall control from the wall.
- Check the wiring between the wall control and the garage door opener, making sure that all connections are secure and undamaged.
- If you find any damaged or disconnected wires, repair or replace them as needed.
- Reattach the wall control to the wall.
- Turn power back on to your garage door opener.
- Test the wall control to see if the slow blinking light has stopped.
Maintenance Tips for the Liftmaster Wall Control
Maintaining your Liftmaster wall control is essential for ensuring its longevity and preventing issues like slow-blinking lights. Here are some maintenance tips to keep your wall control in top condition:
- Keep it Clean: As with any exposed device, dirt, dust, and other debris can build up on your wall control, potentially causing damage to the internal components. Use a soft cloth to wipe down your wall control regularly, and avoid using harsh chemicals that could damage the plastic casing.
- Check the Batteries: The batteries in your wall control are essential for its proper functioning. Check the battery level periodically and replace them as needed. It’s also a good idea to replace the batteries at least once a year to prevent any potential issues.
- Inspect the Wiring: The wiring between the wall control and the garage door opener can become damaged or disconnected over time. Inspect the wiring periodically to ensure that all connections are secure and undamaged. If you notice any damage or issues, repair or replace the wiring as needed.
- Test the Buttons: Regularly test the buttons on your wall control to ensure they are working correctly. If you notice any issues, such as buttons that stick or don’t respond, it may be time to replace the wall control.
- Keep it Protected: Your wall control is exposed to a variety of elements, including moisture and temperature fluctuations. Protect it from these elements by keeping it out of direct sunlight and away from any areas that may become damp or wet.
- Replace When Necessary: Even with proper maintenance, your Liftmaster wall control will eventually wear out and need to be replaced. If you notice any persistent issues or your wall control is more than a few years old, it may be time to replace it.
Following these maintenance tips will ensure that your Liftmaster wall control remains in top condition.
Conclusion
While the Liftmaster wall control blinking slowly can be worrisome, fixing it only requires following a few simple steps. By understanding what causes this issue and following the solutions outlined above, you can get your garage door opener back up and running in no time.
Apply the fixes above won’t require any professional assistance, however, if you’re unsure about any maintenance steps or need help with repairs, it’s always best to consult a professional technician.
Related:
- Hikvision Camera Mounting Options & Tips
- Garage Door Opener Mounting Options & Tips
- Ring Floodlight Camera Mounting Options & Tips
- Arlo Camera Mounting Ideas & Tips
- Reolink Two-way Audio Not Working: Causes & Fixes
- Petcube Two-way Audio Not Working: Causes & Fixes
- Blink 2-Way Audio Not Working: Causes & Fixes
- Zosi Camera Troubleshooting Guide & Manual
- Kidde Smoke Alarm Light Codes Explained in Detail
- Kidde Smoke Alarms Going Off for No Reason: Causes & Fixes
